Hey coffee drinkers, I hear your questions! How do you clean a Keurig coffee maker? I get asked this question so many times. And while I’m not a coffee drinker myself anymore (tea for me!) I am here to help all, you coffee addicts.
We wrote Clean A Keurig Coffee Maker way back in 2017, but since then, a whole new host of questions about cleaning Keurigs have come up! In this article, we’re going to talk about Keurig cleaning pods, cleaning Keurig with vinegar, Keurig 2.0 cleaning, and how to assemble your own personal Keurig cleaning kit complete with DIY Keurig cleaning solution. So grab your coffee mugs, and let’s get to it!

Do You Need To Clean A Keurig Coffee Maker?
Yes, yes, a thousand times, yes you need to clean your coffee maker! Coffee grounds and water residue build up in your Keurig over time. And while this might not sound like it matters, this residue can wear on your machine over time, meaning it won’t work as well as it should.
A broken coffee machine is an absolute nightmare for any coffee drinker, so prevent coffee withdrawals by properly cleaning your machine. You don’t have to do this every day. You don’t even have to do it every month (phew!). But a proper deep clean of your Keurig is a good idea approximately every three months.
Keurig Cleaning Pods: Do They Work?
One of the many appealing things about Keurig’s is that they’re easy to use. You simply pop a pod into the machine, and you’ve got great coffee. In the same way, Keurig cleaning pods seem like the perfect solution to your cleaning needs. You put a pod in your machine, and voila, it’s all clean. But is it?
While Keurig cleaning pods definitely do clean the parts of your Keurig between the K-cup and the mug. But unfortunately, these cleaning pods can’t access anywhere else. Meaning you’re not getting a thorough clean from using them. Plus, these pods are one use, so they aren’t very friendly to our environment.
For a thorough clean of your entire machine, you’ll need to do it by hand. I know, I know, just one more thing to clean. But it’s worth it for great-tasting coffee and great functionality of your Keurig.
Keurig Cleaning Kit: Everything You Need
So what should you do instead of using Keurig cleaning pods? Assemble your own arsenal of tools and products for a personalized Keurig cleaning kit, of course.
What you need:
I recommend keeping this all together and using this cleaning toothbrush for your Keurig only. That way, you aren’t getting any contamination from other cleaning products or items cleaned.

Keurig and Keurig 2.0 Cleaning
OK, so it’s finally time to clean the Keurig. Let’s break it down into easy steps. This whole process should only take about fifteen minutes.
- Unplug your Keurig. Do not forget to do this!
- Disassemble the machine. Remove the reservoir, lid, drip tray, cover, K-cup holder, and funnel. Be careful removing the funnel; there’s a sharp needle attached!
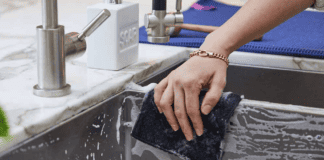
- Fill your sink with hot water and one teaspoon of dish soap. Then, soak all the components of your machine, except the K-cup, for ten minutes.
- While everything else is soaking, use a cleaning toothbrush to gently dislodge coffee grinds from the K-cup. Then, use your microfiber cloth to remove any water buildup.
- When the inside of your K-cup is clean, spray some all-purpose cleaner on the outside and wipe with a microfiber cloth.
- If you see any white crusty buildup (limescale deposits), use your microfiber cloth soaked in vinegar to clean the area.
- Dry everything COMPLETELY before re-assembling your Keurig.
How to Descale A Keurig
Whoops, you thought you were done. But you’ve got one more step to go. Descaling your Keurig means removing limescale buildup. And it’s something you absolutely must do to keep your machine running. Luckily, it’s really easy.
Once your machine is cleaned and re-assembled, fill the reservoir halfway with white vinegar. Then, brew! This will remove limescale from the reservoir and tubing and break down calcium deposits.
When the vinegar has run through, remove the reservoir and rinse well. Fill it with water and continue “brewing” until the vinegar smell is flushed out completely. You may need to run this through with water a few times unless you like vinegar in your coffee. And now you’re done cleaning.
Clean Your Keurig!
Cleaning your Keurig every three months will ensure it lasts for a long, long time and that your coffee tastes great! And with your personal Keurig cleaning kit, this should be a breeze.
So now you know everything you need to know about cleaning a Keurig. But when you need to clean coffee off yourself, be sure to check out How to Get Coffee Stains Out of Clothing.
Looking for a BETTER & EASIER Way to Clean Your Home?
Cleaning Expert Melissa Maker is here to help with her game-changing 3 Wave Cleaning System that will help you clean your house faster and easier than you ever thought possible!


