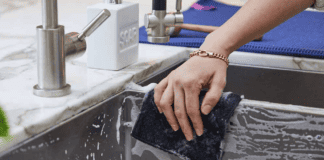
Spring has sprung, and though we just got another truckload of snow in Toronto, where I live, there is hope in sight. And with spring comes that dreaded task: spring cleaning. As you probably all know, I’m no cleaning lover. But spring cleaning can be really refreshing and rewarding.
All those little tasks you’ve been putting off can get done in one sweep, particularly if you enlist your whole family to help out. So what should you actually be doing in your spring cleaning? Follow this spring cleaning checklist, and you’ll hit every area in your home that needs some extra love this season.

Clean Walls and Baseboards
Spring cleaning is all about tackling those areas that aren’t included in our regular cleaning routines. If you’re cleaning walls and baseboards on a regular basis, my hat is off to you. And can you please come clean my house?!
But for all us normal people with dusty baseboards and fingerprint-laden walls, now’s the time to deal with them. First, use a dry microfiber mop (check out the Maker’s Clean Mop) in an “S” pattern up and down the wall. Then, mix up a solution of a gallon of water, a tablespoon of dish soap, and a cup of white vinegar.
Wet your mop pad and work section by section, using the “W” pattern. Finally, dry your wall with a dry microfiber cloth or dry microfiber mop pad. To clean baseboards, use a microfiber cloth and my famous DIY all-purpose cleaner.

Swap Out Seasonal Clothing
If you don’t change out your closet seasonally, this is your sign. Well, I guess it’s not really a sign; it’s just a suggestion. But still… try it out!
Closets aren’t designed to hold four seasons’ worth of clothing, and if you have large closets that can accommodate that many clothes, you probably struggle to find items you’re looking for among the dozens of jackets, tank tops, sweaters, and bathing suits.
There are three steps when it comes to cleaning out clothing closets: sort, review and declutter, restock and store, rinse and repeat. If you need more help tackling your closet, read Organizing & Storing Seasonal Clothing!
Declutter Your Front Hall Closet
Since we’re talking closets, let’s deal with the front hall closet. Since the front hall closet is usually right at the front door, it becomes a mess of things that your household chucks in as they walk in the door. I know there’s at least one broken umbrella at the back of my front closet that I’ve been meaning to throw away for about three months.
To declutter and clean the front hall closet, take everything out. Yes, everything. Then vacuum the inside and wipe down the walls and/or door (whatever needs it) with a microfiber cloth. My front hall closet has mirrored doors, so I use a mixture of water and vinegar to wipe them down.
Then go through all the junk that’s been living rent-free in your front hall closet for the past year. I like to have a trash bag and recycling bin with me when I do this, so I can chuck things directly in as I go. Finally, put everything back neatly. I go through the whole thing step-by-step in my article, Clean & Organize Your Front Hall Closet: Spring Cleaning!
Wipe Down Cupboards and Drawers
Cupboards and drawers, especially in the kitchen, can get pretty grimy. And those spilled cracker crumbs, rogue cheerios, and adventurous popcorn kernels aren’t going to just get up and walk away.
Luckily, cleaning your cupboards is really easy. All you need is a microfiber cloth, all-purpose cleaner, a sponge, and trash and recycling bins. And if you’re short like me, you will probably also need a step stool.
Remove everything from each cupboard before you clean. This ensures you won’t miss any spots; plus, as you go, you can throw empty boxes or anything you don’t need anymore into the trash or recycling.
When a cupboard or drawer is empty, go in with your all-purpose cleaner and spray everything. Then wipe well with your microfiber cloth. For a more detailed run-down of cleaning drawers and cupboards, including how to deal with stuck-on stains, read Cleaning Kitchen Cupboards & Drawers: Spring Cleaning!
Wash Your Exterior Windows
Here’s another chore you can technically do in the winter, but it’s much more pleasant in the sprint. Take advantage of the warmer weather to wash the exterior of your windows.
To clean your exterior windows, whip up a batch of DIY window cleaner. Add one gallon of water, one cup of white vinegar, and one teaspoon of dish soap to a large bucket. Your cleaning tool here is going to be a double-sided squeegee. I have a really long one, which makes cleaning windows a lot easier.
Dip your squeegee into the bucket, so it’s sopping wet. Then, start from the top of the window and work your way down. Then, flip the squeegee over to the rubber side and repeat. For more info on cleaning windows plus a breakdown of how to clean window frames, read How to Clean Interior and Exterior Windows.

Clean Your Washing Machine and Dryer
It may sound silly to clean a thing that cleans, but it’s not. Cleaning your washer and dryer helps keep them in tip-top shape. Meaning your very expensive machines will last longer. And both machines are really cheap to clean, so cleaning your washer and dryer could save you a lot of money in repairs and replacements.
To clean your washing machine, you need baking soda and vinegar. In an empty washing machine, add two cups of baking soda directly into the machine and run a cycle. When the cycle is finished, do the same thing with two cups of white vinegar. Finally, give the inside a quick wipe with a microfiber cloth. You can use vinegar or all-purpose cleaner on the other elements of your machine.
For dryers, you’ll actually need to take a few components apart. This is definitely a pain, but built-up dryer lint is a fire hazard, so don’t skip this. Follow the manufacturer’s instructions for removing parts, and then give the lint trap, drum, and removed parts a good vacuum. Then, wipe everything down with a microfiber cloth and all-purpose cleaner. For more info and detailed instructions on cleaning washers and dryers, read, How to Clean Your Washing Machine & Dryer: Spring Cleaning!
Replace Your Furnace Filter
Did you know that you should be changing your furnace filter four times a year? This is really important to do because filters are responsible for keeping our air clean! For people with allergies, you might notice a reduction in allergy symptoms when you swap out a dirty furnace filter with a clean one.
Changing your furnace filter is as easy as popping the old one out and replacing it. And most furnace filters can be bought at your local hardware store. Always check your manufacturer’s instructions for this.
If you’re concerned about the air quality in your home, or you just want more information, be sure to read How Can You Improve Indoor Air Quality: 6 Tips.
Deep Clean Your Rugs
This cleaning tip will make you feel pretty old school, but bring your rugs outside and give them a good shake. This is a really easy way to get a bunch of dirt, dust, and debris out of your rugs quickly.
Of course, this is too much of a hassle to do every time you vacuum, but it’s a fun spring cleaning chore. Yes, I said fun and chore in the same sentence. Forgive me. After you bang out your rugs, bring them back inside and give them a good vacuum.
If your rugs are really bad, read my article, Carpet Squeegee: TikTok Cleaning Hacks, for a cool solution. Or, if your vacuum isn’t doing its job anymore, read Which Dyson Vacuum Should You Buy?

Spring Cleaning Checklist
Once you’ve checked all these items off your list, your home will feel fresh and clean. While spring cleaning is not my favorite part of spring, it’s nice to get it over with and know that my house has undergone a deep clean.
Enlist the whole household, and give everyone an item (or two) on the list, so it doesn’t seem like such a daunting task. And for the ultimate spring cleaning checklist you can print out and keep with you season after season check out my Spring Cleaning Guide printable!
Looking for a BETTER & EASIER Way to Clean Your Home?
Cleaning Expert Melissa Maker is here to help with her game-changing 3 Wave Cleaning System that will help you clean your house faster and easier than you ever thought possible!


hi
good article
This is such a refreshing and informative article! (No spring pun intended 😉 )
Many people do wait until the Spring or Summer to take the time and clean off their windows or have a professional service do it, when the sun begins to shine through and show that dirty mess! Thanks for pointing out in this article that all year round window maintenance is the best way to go. Tis the season now for Spring Cleaning!