Let’s go pro-level deep and look at the features, tools, and maintenance of Dyson’s latest stick vacuum. This is a comprehensive review of the Dyson V11 stick vacuum.
We buy amazing tech but sometimes those next-level features never actualize for us because we don’t take the time to learn how to use the item to its maximum capabilities. When I got my Dyson V11, I sat down for an hour or so reading instructions and watching videos learning as much as I could. Not because I have tons of time or a passion for vacuums (in fact, it’s my least favorite cleaning task), but because I just want to be so efficient with it so I can get the best results in the least amount of time. Plus, it’s my job. But most people aren’t pro cleaners for a living like I am, which is why I’m going to take what I have learned and level you up really quickly. You’ll have your Ph.D. in Dyson V11-ology by the time I’m done with you. I have designed this post to teach you everything you’ll need to know about using it LIKE A PRO, all in layman’s terms.
I am so excited to be partnering with Dyson Canada on this post; it has been a longtime dream of mine to work with Dyson since I’ve been using their tools for so many years and can vouch for how top-notch they are. So three cheers for realizing your dreams!
An overview
We’ll cover the simple stuff you need to know in order to be fully operational in record time.
How to Assemble the Dyson V11:
The design is simple – the red buttons you see can be pressed to release the attached object or tool, and that’s where to match the snap-in connector. I find that a lot of people struggle with the mechanics of attaching and detaching attachments on vacuums which leads to rattling, shaking and unnecessary ‘vacuum aggression’ (which I’ve been known to have myself). A tip I always share is, if you are working too hard or feel you might break something while attaching or removing a tool, that’s not how the mechanism was intended to be operated. If you are doing this properly, it should be very easy. If it’s not easy, re-strategize until you figure it out.
Two-in-One design
The beauty of a cordless stick vacuum is that you can use it as a handheld vacuum (e.g. no pole) for tighter areas in vehicles, on stairs or for vacuum-assisted dusting as well as a full stick vacuum (e.g. with pole) to clean floors – and hey, with the right attachment you can also tackle your high-dusting. In other words, you don’t need a bulky vacuum, plus a handheld. This machine can do both.
Wall mount
The wall mount isn’t just there to look pretty, it charges your vacuum when not in use and stores tools. Plus, let’s be honest, it looks RAD. Hang it up. Just do it. Trust me.
Select power modes: new for V11
Dyson has allowed users to select power modes for several iterations now. With the V11, three options are offered to help maximize up to approximately 60 minutes of fade-free cleaning (I’ll explain this concept shortly!) on a single charge. The three settings are:
- Green for eco, which is perfect for hard floors or light cleaning (think: crumbs after dinner)
- Blue for auto, which automatically selects how much power is needed based on the flooring type it detects. Auto mode is automatically activated when the Torque Drive Head is engaged.
- Red for max or boost, which is perfect for those very grotty areas (think: entryway mats with ground-in dirt or cushions with tons of pet hair).
You can easily select the mode by tapping the silver button and remember, the less power the vacuum uses, the longer the battery can last. A feature I really like that the LCD screen displays a run-time countdown to the second while the vacuum is in use. This allows you to make better power mode decisions and maximize your cleaning time. Interestingly, a lot of people think they have to clean in max mode to get the best clean – a common mistake that drains the battery – but remember, the vacuum can perform really well in all three modes. Engage the right mode at the right time and you’ll always get great results. Also, a quick reminder this is a dry vacuum only, so please don’t use this on anything damp or wet – let all surfaces dry before using.
Suction
One of the criticisms that cordless vacuums receive is that they compromise on suction. They’re so small, they have no corded power source, how can it really…clean? I hear this all the time. In fact, when tested, the V11 twice the suction of any cord-free vacuum on the market (!!!!). Further, it offers up to 60 minutes of fade-free cleaning. When you read the term ‘fade-free’ battery, this means that toward the end of the clean when the charge is just about gone, the vacuum will still work as well as it did when it just finished charging. I have noticed that time and again, when I use it on debris both large and small, it does a great job with suction. Yes, I’m a fan if it wasn’t already obvious.
LCD Screen
This is a very handy addition to the V11 model. Not only does it display power modes and has that run-time countdown that I mentioned earlier, but it also helps troubleshoot blockages and common problems. If it detects a blockage, it’ll display a message on the screen and show you where to look for the blockage. Dyson told me that about 80% of their help center calls were for easily solvable challenges which is why they created this handy feature. I also like it because rather than scheduling or guessing, the screen will tell you when to clean the filter (it even reminds you how to twist it off!). Honestly, when I first heard about the screen I wasn’t overly moved by it but once trying it out and comparing it to previous Dyson models and other brands, I understood just how helpful this feature was. It allowed me to be smarter with my vacuuming.
Dyson Digital Motor
This is where we can go really deep on technology, but I am not going to do that here because I need you to stay with me. What you need to know is this: Dyson has over 300 engineers working in the motors team alone, and you can clearly see how well dirt is being sucked up by just looking in the bin. It’s hard technology to replicate and they do it really well, arguably, best in the category.
Filtration
I find this can be one of the more confusing things to understand when we are being ‘told’ about a vacuum, so I want to take the time to explain this. A vacuum’s job is to remove allergens and dirt from the surface it covers, filter out these particles – large and small – from the air, it sucks up and expels clean air via the exhaust – thus improving indoor air quality all the while not clogging, overheating and looking sleek. It’s a BIG ask. A lot has to go right for this to work properly and many vacuums simply fall short. While admittedly geeky, I think this should be a major consideration factor when thinking about vacuums because this is what vacuums are all about, improving indoor air quality by removing dust, debris, and allergens.
When air and debris end up in a vacuum’s bin/canister, we hope everything filters out by the time the exhaust air blows out. With a Dyson vacuum, the design is such that a lot happens right IN THE BIN before air ever hits the filters at the back/top of the vacuum thanks to cyclone technology and the digital motor (this is called full machine filtration). Let me explain: when dirt and air are sucked into the bin, the motor activates that cyclone technology to spin super fast and separate out dirt and allergens from the air. By the time the air has been shot out of the bin and into the top filtration system, much of it has already been cleaned, leaving those filters to do less work. In fact, the filtration system is so powerful that it captures 99.97% of particles as small as 0.3 microns, making sure only clean air is expelled – so that exhaust air hitting you is ????CLEAN????. As an aside, I am told the V11 filtration and sealing system took three engineers and six months to perfect! Plus, the V11 filters are hand washable, reusable, and the LCD screen will indicate when the filter needs cleaning. I should also mention that Dyson vacuums are allergy and asthma certified. If you have pets, kids, or allergy and asthma sufferers at home, effective filtration is non-negotiable. Comprehensive, yes. Geeky, yes. Important, yes.
Tool Review & Tutorial
When I started vacuuming professionally years ago, I had absolutely no idea what all of the tools were for and how they could be used even though the instructions were right there. I know most people feel the same way. I am going to break the tools down so that by the time you’re done with this section, you’ll be a vacuum wiz. Really, knowing what tools to use and how to use them makes this job infinitely easier.
With tools, I like to think ahead about what I’ll need for the job and use the little onboard storage clip to take tools around with me before I get rolling. I keep everything in my laundry room/mudroom and while the vacuum hangs on the wall, the wall mount can only keep two tools on it so I keep a small basket underneath where spare attachments go.
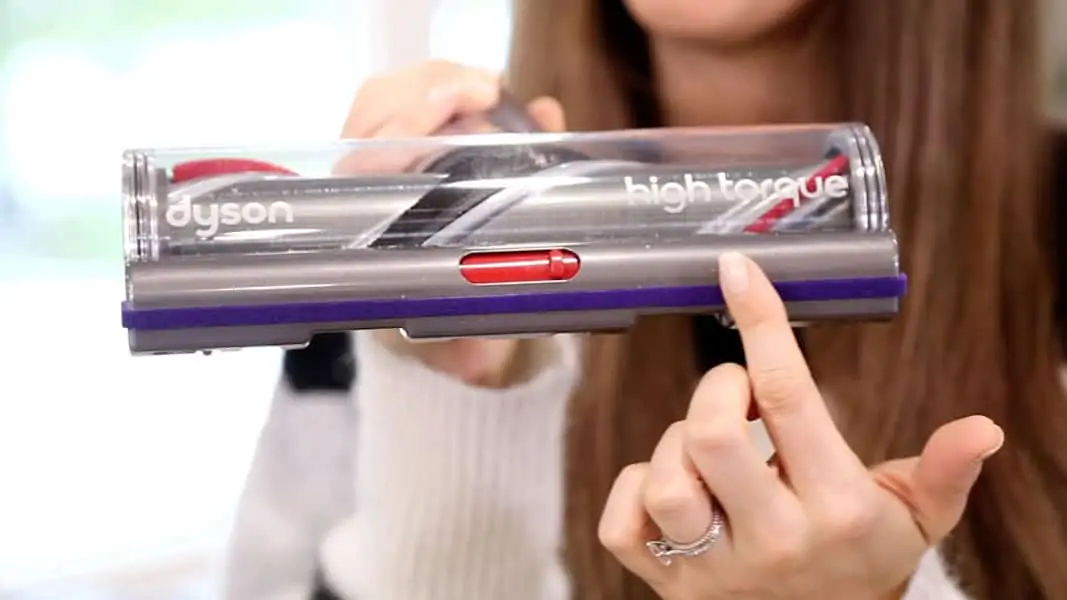
Nickel Torque Drive head
This is the head you’ll want to use for all soft surfaces, but know that it can transition and be used on hard floor surfaces, too. This head features Dyson’s Dynamic Load Sensor technology which means the tool knows how much suction is required for a job based on the floor type, ensuring you get more out of your battery life – all by kicking the vacuum into auto mode when the cleaner head is clicked in. What’s cool is that when it transitions from hard to soft surfaces, you’ll hear the suction level adjust.
A couple of other things to note, the velvet strip bordering the frame helps to protect the vacuum head from nicking a piece of furniture or a wall if it bumps into it, and the red +/- adjuster on the front allows you to manually adjust for high (+) or low (-) pile carpet. You’ll find once you make that adjustment, your vacuum glides easily on carpet. I leave it on (-) because I have low pile rugs and hard floors.
Soft roller cleaner head
This is red and purple and fluffy and pretty. The soft woven nylon and anti-static carbon fiber is specifically for hard floors (the softness protects from scratching!) and the carbon fiber – that black strip running through the head – creates a magnetic pull for dirt. You can use this if you are just doing hard floors and don’t plan to transition to soft surfaces. I use this the most because we have hard floors but I change to the Torque head when I’m in my bedroom since we have an area rug in there.

Mini motorized tool
This tool is activated by the motor, so the mini brush roller head can grind in and pick up dirt and debris in smaller areas that can be otherwise difficult to vacuum. It can be used on the stick – great for stairs – or on the vacuum directly, which is how I like to use it for upholstery. It’s perfect for car cleaning, too. I use this in max mode when I clean my front entryway mat and the chair my cat frequents and it picks up all of the ground in dirt or pet hair with ease.
Quick-release combo tool
This offers up two in one for cleaning tight spaces around the house. Admittedly, when I first started vacuuming with a Dyson I had no clue what this tool was for but I’ve since seen the light: it provides extra cleaning oomph to tight areas where a bit of brushing is needed before anything can be vacuumed up. For example, I have a sliding glass door leading to a deck. The tracks get dusty and dirty when the door is used a lot in the summer. This tool is perfect for cleaning that sliding door track – it sweeps the tight corners and tiny edges that collect dust and leaves the tight area clean. So the next time you find yourself vacuuming and tight corner and wish you could just sweep some debris out before vacuuming, that’s when you’ll reach for this combo tool. It’s also great for car interiors and when snapped into the extension pole, it’s perfect for high dusting. Remember, if you don’t need the bristles, just pull them back and use the larger crevice tool.
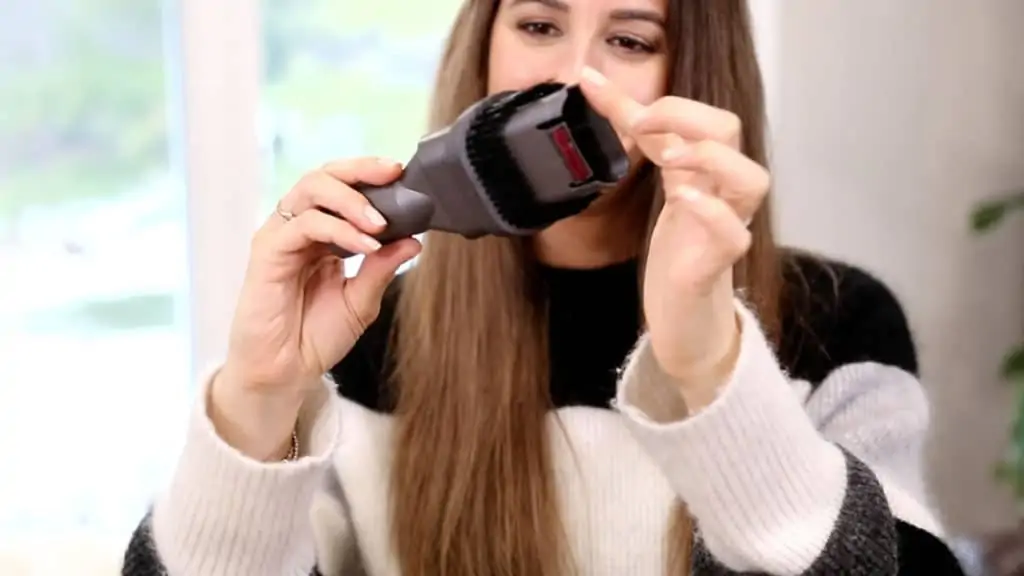
Quick-release crevice tool
The crevice tool is used to get right into those tight spaces your vacuum couldn’t reach. It’s your precision cleaner. I like to use it for cleaning around edges and narrow gaps, under and between appliances, baseboards, kick plates, on steps around spindles and where the riser meets the tread, where the carpet meets the wall, doorway thresholds (sliding doors), inside vents, crevices in the foundation of the sofa, etc. There are lots of uses for this angled beauty!
Quick-release mini soft dusting brush
Here’s another tool I wasn’t quite sold on for a while until I figured it out and started using it. Tsk tsk, just another classic example of how something so brilliant can be underutilized. The oval-shaped brush with soft bristles is used for delicate surface cleaning or – and this is a thing – vacuum-assisted dusting. Never heard of it? That’s OK. For all the years you wished you could have used a vacuum to get the dust out of those terribly tricky areas such as piles of computer wires, your crumb-laden keyboard, artwork, dusty light fixtures, mantles, brick or textured walls, tops of books on a bookshelf, planters, woven baskets, door frames and door panels, lampshades.. you get the idea! Problem now solved! You just needed vacuum-assisted dusting in your life. And here it is! The soft bristles gently sweep the dust away and are flexible enough to clean surfaces that have a lot of texture or are quite delicate.

Quick-release mini stiff bristle brush
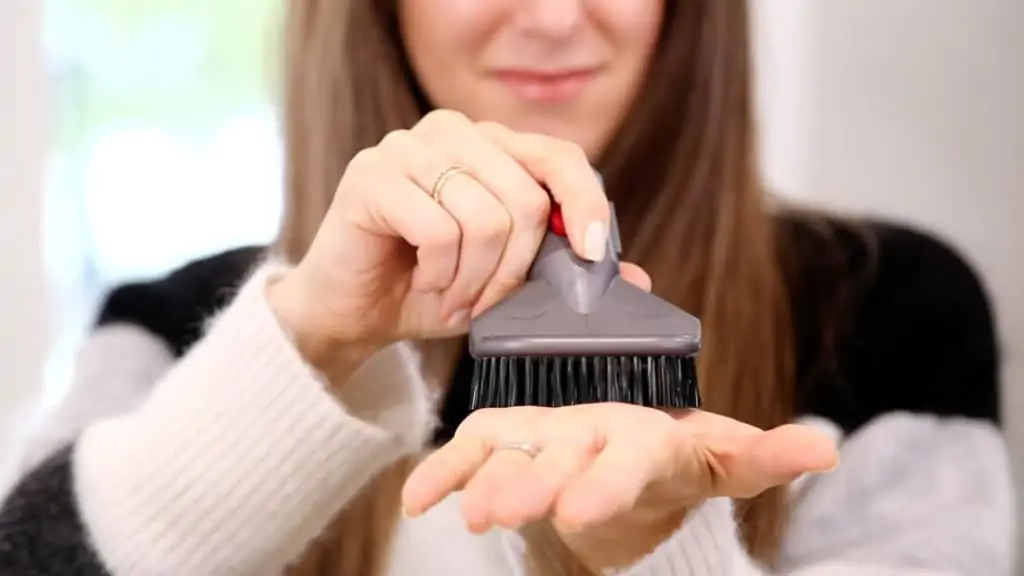
This would be the opposite of the soft dusting brush – a brush with firm bristles designed to dislodge dirt from floors and furniture. I like to use this one for cleaning coarse carpets or doormats, car interiors, and high traffic areas. While I don’t use this one often because I clean these areas less frequently, when I have used it, it has come through beautifully.
Maintaining and cleaning
And now, cleaning the vacuum cleaner. As the famous meme goes, when you clean the vacuum cleaner, you become the vacuum cleaner. The Dyson V11 is simple to maintain *but* maintenance is crucial. Since these aren’t exactly a drop in the bucket, I want to show you how to take proper care of yours. If you take care of it, it will last you for a long, long time.
How to empty your vacuum
The V11 has an easy to use and hygienic ‘point and shoot’ design, meaning that your face is far, far away from the bin/canister as it empties out. I’ve spent years vacuuming with various vacuums and I can’t tell you how many times a poorly-designed vacuum has literally blown dirt in my face upon emptying. When ready to empty (please, don’t be one of those people who lets the vacuum debris go over the max fill line!), remove all tools and hold the vacuum, bin facing down, over a garbage bin. Place your finger and thumb on the red tab and push downward. The bin will pop down, releasing the debris. Give it a good shake and then manually close the lid and pop the bin back up until you hear an audible click.
How to clean the vacuum bin/canister
If the bin is looking unsavory, you can remove it by adding one step to the emptying routine: flip it over and press the red tab in at the bottom of the sliding mechanism. This allows the bin to pop right off. Take a dampened cloth and wipe the interior gently, allow to dry fully and replace (24 hours is generally how long it takes to completely air dry).
How to clean the filter
The first thing to know is, there are two filters you can clean. They’re attached, so no need to go hunting for both. To clean the filter, simply turn the filter (the purple encasement with the paper fan) counterclockwise, and remove it. Place the vacuum aside, and run the paper fan underwater to rinse well. Then, rinse the foam filter by placing one hand at the bottom of the filter to create a base, fill with water, place your other hand on top and shake well. Dump the water out, rinse well until the filter and the water running off looks clean and leave to dry. I’d say leave for 24-48 hours to be safe and then replace. Any moisture in the vacuum is bad news, so play it safe here. Remember, the LED display will tell you when the filter needs cleaning so there’s no guessing.
How to clean the tools
Your tools do a lot of dirty work and every now and then, flip them over and visually inspect for hair or string entanglement, debris build-up, blockages, and matted bristles. Motorized heads can be cleaned by using a coin to unlock the head, gently pop each out and use a seam ripper or scissor blade to gently remove hair and string. The brush rollers can be wiped and dried, and anything else in need of a clean can be wiped with a damp cloth and allowed time to fully dry before assembling.
Non-motorized tools can be rinsed with soapy water and allowed to air dry. For scrubbing, grab a cleaning toothbrush and remove build-up or debris before rinsing and allowing to air dry.
I know this was a bit long, but listen, if I am going to teach you how to use a Dyson V11 stick vacuum, I am going to teach you the RIGHT way to use it. And now that you know what you know, I can assure you that you’ll use it to its maximum capacity and get much more utility and enjoyment out of it. And that’s saying a lot from someone who hates to vacuum!
Again, a special thanks to Dyson Canada for partnering with us on this article. If you want to learn more about the vacuum you can visit Dyson Canada.
Looking for a BETTER & EASIER Way to Clean Your Home?
Cleaning Expert Melissa Maker is here to help with her game-changing 3 Wave Cleaning System that will help you clean your house faster and easier than you ever thought possible!









Do I keep both battery packs plugged in at all times?
The extension part, is an additional purchase. Dyson must have provided it to you as part of the set
WHAT a GREAT overview for my new Dyson V11! Most of the tools have been sitting in the box for the last couple of months since purchase! Now I’m ready to put them to use! Melissa, you are an excellent teacher/speaker/demonstrator! So clear, concise, easy to follow! I loved this overview, and I look forward to seeing your in-depth tutorials. Plus! I will check out your overall blog, since I like your style! Only not-so-hot comment so far on my new vac–I’m short, petite, and just turned 70, so the unit is a little on the heavy side for me, but I may get used to it…I’ve always wanted to own a Dyson! And now I do!!! Oh, and it’s my first stick vac! Yeah…what took me so long?!!! 😀
How do I use the digital button on my new Dyson 11 vac?
Great video! I’ve owned a V8 Animal + for about 2 years, really enjoy it. I also have a couple Robot vacuums for my main floor (hardwood) and lower/upper levels (carpet) – I don’t like to vacuum either. I do enjoy taking down the V8 for dusting, quick clean-ups, and for use in the car, I like a clean home! I have three levels and thought it would be nice to have another V8 downstairs. I came across an incredible deal on the V11 Torque, it was the same price as the V8 Animal at Costco so thought why not? I’m charging it now and am sure it will come in handy. Like you, I’m reading the instructions and overdosing on YouTube V11 videos – I’m binge watching Vacuum wars, a little sad, I know, but it is a great resource, pretty amazing actually and it helps justify my decision to buy these expensive vacs. Really enjoyed your tutorial on the V11 – thank you!!!
Hi, I was dismantling and cleaning the vaccum bin and I realised hairs and debris stuck around the red rubber ring, while cleaning the rubber ring and a clip plastic drop out and would like to check how do I fix back the red rubber ring inside the vacuum bin as I am unable to fix back and use. Kindly advise! Thanks!
HOLY SHIRTBALLS. This is exactly what I was looking for after buying my V11. Straightforward, detailed and so darn helpful. Thank you for taking the time to write this. <3
Thanks for posting, Melissa. I cleaned the bin and the filter, but for some reason the red seal in the canister came out and I can’t get it back in ????
Thank you, I have just bought a V11 and the information in the box and on the Dyson website is conspicuously absent! This is a comprehensive and very helpful post. I am saving it for further reference.
Hi Melissa! Does this vacuum have a brush roll shutoff option? I have a wool loop pile area rug that I want to care for but I’m having trouble finding a vacuum that would be gentle enough. I don’t want the beater brush to damage the fibers/loops on my rug.