We spend good money upgrading our homes.
Gorgeously designed homes; sigh. We dream about them, pin ideas about them to our most treasured Pinterest boards, gawk at our neighbors’ renos and take an extra long time shuffling down the aisles of home renovation stores. We are literally obsessed with beautifying our homes. So, when we have saved up enough coin to install that dream shower or perfect counter top, we had better know how to take great care of it and prolong its’ beauty and life.
I have seen so many homes with beautiful finishes that have been poorly maintained. I don’t mean to be rude, but a glass shower that is full of soap scum and hard water doesn’t look the slightest bit pretty. If you are fortunate enough to have these finishes in your home, take good care of them to ensure they look gorgeous for years to come. Now that I’ve opined, here’s the meat and potatoes when it comes to cleaning expensive finishes in your home.
There are three very important parts to maintenance of any object:
- The right cleaning product,
- the right cleaning tool, and
- the right cleaning technique.
So, we’re going to cover off 10 of the most common high-end finishes you’ll find in a home and determine the right tool, product and technique (PTT) to use for each.
 1. Granite
Granite is commonly used as kitchen countertops, bathroom countertops and shower walls, and floors. It is known for its beautiful colours and designs as well as it’s ability to resist scratches, stains and heat (when sealed properly). They instantly boost the luxury factor of a home and are in high demand. Many times a month we get asked how to clean granite.
The right product
Granite is strong but can’t handle certain products. Acidic ones, including vinegar and lemon can cause etching and ammonia-based products can strip the sealant off the stone. No good! So, for granite, be as basic as possible. Aim for a pH neutral cleaner like castile soap or dish liquid – you’ll see as you get through this post that I will recommend it for essentially every finish. If you want to create your own cleaner for natural stone, here’s a terrific recipe. This will clean, leave no streaks and disinfect.
3 cups of water, 1/4 cup of rubbing alcohol, 1 ‘pinky nail’-sized squirt of dish soap and optionally, 5 drops of essential oils (for scent or anti-bacterial properties). Rubbing alcohol disinfects and dries fast!
The right tool
Use a microfiber cloth to wipe, and a non-scratching sponge (double sided, usually blue) if you need some scrubbing action. It won’t scratch!
If you’re looking for quality micfrofiber cloths that will last, then you have to check out Maker’s Clean Premium Cloth Bundle!
The right technique
Shake the product up and squirt on in an even pattern. Wipe off with an ‘S pattern’ and you’ll see how nicely the surface dries and shines. Buff dry with a microfiber cloth if necessary to remove streaks.
 2. Marble
Marble, similar to granite, is a porous stone which is either high-polish or matte. Wiping up spills and removing debris which can lead to scratching on a regular basis is critical. It is also recommended to use coasters or trays wherever possible if placing any liquid on a marble surface, the marble seems to ‘absorb’ moisture and will stain. If something falls on it, it can certainly crack, so it is important to beware of this too. Further, if anything spills on the marble, it needs to be wiped up immediately – removing stains from marble is not easy and tends to require professional help. Because it is so similar to granite, it can be cleaned much in the same fashion. It is also recommended to have marble buffed professionally once per year in order to maintain its shine. While some people have marble counters, it is more commonly found on floors. It’s a risky finish, but nothing says luxury like marble, so you be the judge.
The right product
Similar to granite, marble cannot tolerate any cleaning products. Usually, wiping with water is more that enough to clean marble. However, if you do want to give it a more thorough cleaning, find a castile soap or dish liquid (again, something pH neutral).
The right tool
An angled broom with nylon bristles (or a vacuum with a soft bristle attachment), a soft microfiber head twist mop and a good wringer bucket, as well as a clean microfiber cloth or clean cotton cloth.
The right technique
Sweep floors often, and sweep floors prior to mopping. Mop the floors in an ‘S’ pattern, rinsing the mop head every minute or so. Ensure that it is very well wrung out, almost damp-dry before mopping. Follow up the wet mopping with dry mopping, to get rid of any excess moisture. You can either do this by using the cloth and wiping dry with your hands, or by placing the cloth over a flat head mop and using that to buff the area dry (recommended for larger spaces).
3. Slate
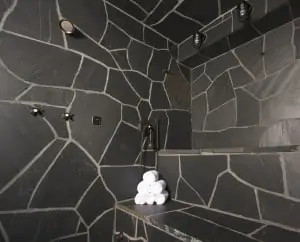
Slate is another type of natural stone; it offers deep, matte greys and textured surfaces which are highly sought after. Usually slate is laid with grout lines showing, whereas other stones tend to limit the amount of grout showing. This can present its own cleaning challenge! That aside, slate’s textured surface creates lots of nooks and crannies for dirt, oil and soap scum to live in (which is why slate is not the best choice for showers). Like all other natural stones, it can scratch easily and is porous, so it is susceptible to stains. The same techniques stand for other stone surfaces; wiping up spills and removing debris which can lead to scratching on a regular basis is critical as well as using coasters and avoiding dropping and dragging items on the stone.
The right product
For cleaning slate shower walls, finding a specialty stone cleaner is crucial (many companies make them, and if you search for a product that can remove soap scum and is safe to use on stone surfaces, you’ll come up with plenty to choose from. For floor cleaning, rely simply upon the same methods for other stone surfaces, simple dish liquid or castile soap. This stone also tends to not tolerate acidic cleaners well, so keeping it simple is best.
The right tool
Again, vacuuming and/or sweeping often to keep debris off the floor is what will keep it looking great. An angled broom with nylon bristles, a soft microfiber head twist mop and a good wringer bucket, as well as a clean microfiber cloth or clean cotton cloth.. For showers, hang a squeegee up to remind other users to squeegee after each use.
The right technique
Similar to the other stone finishes, it is recommended to sweep first and then mop the floors in an ‘S’ pattern, rinsing the mop head every minute or so. Ensure that it is very well wrung out, almost damp-dry before mopping. Follow up the wet mopping with dry mopping, to get rid of any excess moisture. For showers, squeegee the walls from top to bottom after each shower to keep soap scum from setting into the crevices.
4. Travertine
Travertine has a natural yet luxurious look to it. It is usually very light in colour meaning it will can showcase every stain and piece of debris. It is very similar in structure to marble and slate, so it can be treated much the same way. The important thing to keep in mind, especially with travertine is to wipe up stains immediately and to have a good seal on it. Travertine naturally pits over the years, so keep in mind that you will be dealing with more debris caught in the pitting as time goes on.
The right product
A specialty stone cleaner is a great choice for heavier duty jobs, like cleaning a travertine shower. However, for regular floor cleaning, hot water and some neutral soap (dish liquid) is all you need.
The right tool
Vacuuming and/or sweeping often to keep debris off the floor is important to keep debris out of the pitting and reduce the amount of scratching, although this is less evident on travertine. Finding an angled broom with nylon bristles, or a vacuum with a floor brush attachment will do the trick here. For a mop, select a soft microfiber head twist mop and a good wringer bucket. Make sure that mop head is clean (dirty ones will re-deposit dirt into the pores and grout). A squeegee is a great idea for all stone surfaces, including travertine, and can be left in the shower to remind everyone to give the walls a quick swipe after showering.
The right technique
Similar to the other stone finishes, it is recommended to sweep or vacuum the floors frequently to remove debris. For mopping, use an ‘S’ pattern, starting at one end of the room and working your way to the other, rinsing the mop head every minute or so. Ensure that it is very well wrung out, almost damp-dry before mopping. For showers, squeegee the walls from top to bottom after each shower to keep soap scum from setting into the crevices.
5. Glass (walls, tiles)
A departure from stone, lovely! Glass is a terrific finish to have in the house. It’s sleek and modern, clean and versatile. Further, it is non-porous which makes it nice and easy to clean and it keeps stains and bacteria out. The things we need to be most mindful of (aside from the glass breaking, of course) it to ensure we are not scratching it and that we are not letting anything sit on the glass which can cause etching. Etching is a permanent problem and cannot be easily fixed, if at all. The best way to handle etching is to use liquid soap in the shower and squeegee after each use, or else you’ll have etched water marks which will never come off.
The right product
For cleaning glass, the best product to use (that you can come across easily) is pure white vinegar, and ‘full-strength’ vinegar if available. When sprayed on, it can help eat away at some mineral deposits and soap scum. It also cuts grease and leaves a streak-free shine. Stay away from abrasive products too.
The right tool
Keep in mind, stay away from anything that scratches. This means powdered cleansers (unless they are specifically designed for glass), abrasive sponges or razor blades. Have a SKrAPr on hand for showers and back splashes, and always have a squeegee in your shower and learn how to use it, or a supply of clean and soft cotton or microfiber cloths. If you must scrub, use a soft bristle brush only, or a non-scratching sponge. Typically, non-scratching sponges are blue on blue, and the package must always say ‘non-scratching’.
The right technique
Spray the glass with product and let it sit, allowing the surface dirt to break down. After a few minutes, take your sponge and scrub using an ‘S’ pattern working from top to bottom, left to right. When done, rinse the walls and either buff or squeegee dry. This ensures a streak-free shine. Squeegee after each shower to ban any water marks, soap scum or etching from taking place.
6. Hardwood floors
It seems like every home these days is not complete until it has hardwood floors. While they are beautiful, they do require additional care. Too wet? The floors can warp and the planks can separate. Too much debris? The floors will scratch. Oily feet? You’ll see residue and dulling everywhere on the floors. Hardwood requires maintenance, but it is durable and great as a floor finish. Although most hardwood floors come with a varnish, it is still imperative to wipe up spills and stains to avoid them getting into the joints between floor planks, which can lead to moisture damage.
The right product
There’s the obvious, go for whatever the manufacturer sells, however homemade options work just as well and are less expensive. Many ‘oil soaps’ leave residue on the floors, so it is actually recommended to stay away from those. A great solution for hardwood floors is hot water, a small squirt of dish liquid and a capful of vinegar. There are plenty of homemade options, so find what works best for your particular floors. Less product is always better; it leaves less residue and really allows floors to shine.
The right tool
There are lots of options for hardwood floors. A soft-bristle broom or a vacuum with a soft brush attachment is perfect for pre-mopping clean up and should be done regularly to keep debris off the floor. A microfiber head twist mop and a good wringer bucket will keep water droplets off the floor and leave a streak-free shine. Many people love using steam mops on hardwood floors. If this is something you are considering, it is critical to learn how to use it properly and avoid potential damage on the floors.
The right technique
Similar to the other floors we’ve discussed, it is recommended to sweep first and then mop the floors in an ‘S’ pattern, rinsing the mop head every minute or so. Ensure that it is very well wrung out, almost damp-dry before mopping. If you wish, you can follow up the wet mopping with dry mopping, to get rid of any excess moisture. Hardwood is a little more forgiving than stone when it comes to leaving a shine, so if you want to skip the drying off, you should still get great results.
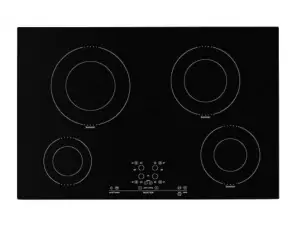
7. Glass Ceramic Cooktop
Many new stoves today come with this finish. It looks sleek, spreads heat evenly and is surprisingly touted as easy to clean. Interestingly, flat cooktops have developed a strong group of haters! Apparently people find them incredibly hard to clean and keep clean, despite the fact that a key feature is how easy they are to clean. A few things to note regarding this finish. First, it is glass and does scratch. Keep the bottom of your pots and pans clean to avoid depositing debris onto the surface. Also, wipe the stove top before turning on the elements to remove debris before cooking. If you do get spillovers, don’t fret, just make sure they are cleaned up immediately (and ideally while the glass is still warm – not hot and not cold). The key here is fast action, the faster you act, the easier to clean.
The right product
You can use essentially any cleaner on this surface, just wait until the element has been turned off and the surface has had a chance to somewhat cool (it is more effective to clean when warm than cold). Some cleaners contain silicone or other fillers that create a residue which can be streaky or challenging to remove. The homemade product which is most effective is water, dish soap and baking soda.
The right tool
There are all kinds of tools available for these cooktops. Avoid using a razor blade (despite how tempting it sounds) because you are more than likely going to scratch the surface. Instead, go for a SKrAPr which has been specifically designed just for this surface (and any glass surface), to scrape the gunk off the surface. Also make sure to have a clean cotton cloth or microfiber cloth to wipe and shine the surface.
The right technique
After each use, ensure you wipe the surface immediately, it may seem like a hassle but that’s what keeps the surface clean. Once it cools, it becomes considerably harder to clean the glass. To cleanse the surface, sprinkle baking soda lightly over soiled areas and spray on a mixture of water and dish liquid. Leave it for a few moments, and then use a SKrAPr to scrub it off. Using a clean cloth, rinse the surface well to remove baking soda residue. Continue doing this until the baking soda comes off and then buff the surface to dry and shine.
8. High Gloss Furniture
This decor has become pervasive in modern home design and it is not going anywhere soon. It’s gorgeous; looks sleek and clean. However, because of the processes used to create the high-gloss sheen (often lacquered over wood), it can scratch, dent and chip easily. Further, cleaning it with the wrong cleaning product can strip the sheen and make the piece look worn and perhaps damaged.
The right product
Water is the safest option for regular cleaning, and not a lot of it. Too much water can warp the lacquer. If you do choose to polish your piece, avoid silicone-based polishes and pick up a specialty cream polish designed for lacquered pieces specifically, do not try to create your own or use a substitute. This is a really expensive finish to repair. It is also recommended to test the product first in a hidden area, and you also need to consider whether the product has a high polish or if it is slightly matted, which will affect the polish you choose.
The right tool
A flat, optical cloth is your best bet. Not only can this polish and shine without any product (and only slightly dampened), it cannot cling on to small pieces of debris which can scratch.
The right technique
Dusting often with the optical cloth is best for this very delicate finish. Apply gentle pressure so that you are not buffing off any sheen. Work in the direction of the grain (if it is showing) and use an ‘S’ pattern to remove dust starting at the top and working your way to the bottom. If you encounter fingerprints or a smudge, dampen the cloth slightly and gently polishing in a gentle circular motion to remove fingerprints and spots.
9. Concrete
Concrete floors, pillars and counter tops ooze modernity from every pore. Concrete is a porous material and while the former statement was more figurative, pores are a bit troublesome when it comes to cleaning. Much like our skin, porous materials absorb dirt and stains and can become discolored over time (unlike our skin, which creates pimples). So, being mindful of spills and wiping them up immediately, being careful with what is placed on the floor and the cleanliness of the tools being used to clean the floors can help in maintaining the even tone of concrete. Dirty concrete looks splotchy and the best way to prevent this is to ensure you have an effective sealant on the concrete.
The right product
To mop floors, use a solution of 2 drops of neutral soap in a bucket filled with hot water. For oil-stained concrete, use powdered dish detergent and hot water (method explained below).
The right tool
A steam cleaner can also assist with blasting stains out of concrete floors. Using a clean mop is critical and because it is hard to streak a cement floor, you can use any mop you like. So long as the mop is clean, the floors will look good. You can use a vacuum with a brush floor attachment or a stiff-bristle broom to remove debris. It is also recommended to use a stiff bristle brush for scrubbing out stains. This floor is not completely impervious to damage, but it is quite tough. For heavily soiled floors a professional can be brought in and a large scrubbing machine can be used.
The right technique
For general cleaning, it is recommended to sweep and vacuum regularly and mop occasionally. To remove grease stains from the floor, wet the stained area, and apply a paste made from dish detergent powder and hot water. Allow this to sit for 10 minutes, then use the scrub brush to remove the stain. Keep in mind that this will clean the areas surrounding the stain and you will notice a cleaner area (so almost a negative stain). Keep this in mind.
10. Stainless Steel
This is yet another sign of the times. Stainless steel is a widespread trend and is considered the standard for new appliance purchases. It is the finish we love to hate; it looks gorgeous until you touch it. And then it angers you. Fingerprints are almost an expectation, and it’s totally unavoidable. However, stainless steel, once mastered, is a terrific and durable finish to have in the kitchen. Certain products cause staining and discoloration on stainless steel, so it is recommended to be careful and use basic products to clean the finish.
The right product
For cleaning stainless steel, all that is required is a few drops of dish liquid mixed into a cup of water. The soapy spray will remove the grease and fingerprints. Then, you’ll want to use a polish, and we like using a small dab of olive oil to do this instead of purchasing a product.
The right tool
To clean, you’ll need 2 microfiber cloths; one for washing down, and one for buffing dry. You will need paper towel to apply the oil polish as well. A steam cleaner can also assist with cleaning stainless steel, and after the steam is applied all you’ll need to do is buff the fridge dry with a microfiber cloth.
The right technique
Spray the soapy water all over the stainless steel; this will remove grease, build up and fingerprints. Then, rinse that cloth out and when the water runs clear, wipe all the soapy water off the stainless steel. Take your dry cloth and buff dry, attempting to get rid of streaks. Finally, add a few drops of oil to your cloth and wipe in the direction of the grain, massaging the oil in evenly as you go. Wipe off any excess oil to reveal a gorgeous shine.
So, now that you are an armchair expert in cleaning all sorts of high-end household finishes, go ahead and upgrade your finishes with confidence, you can enjoy them by properly maintaining them for years to come!
What are your cleaning tips and tricks for the finishes listed here, we want to know!
If you’re looking to up your cleaning game check out our E-Book Bundle! It gives you three amazing e-books (The Complete Guide to Essential Oils, My 3-Wave Cleaning System, and 50 DIY Cleaning Recipes) and is the perfect gift for any cleaning fanatics out there!

Looking for a BETTER & EASIER Way to Clean Your Home?
Cleaning Expert Melissa Maker is here to help with her game-changing 3 Wave Cleaning System that will help you clean your house faster and easier than you ever thought possible!











This cleaner is so cool. Did anyone do try it before?
Great post! I appreciate your efforts in collecting and sharing this huge information about the different types of natural stone!
I accidentally sprayed vim bathroom cleaner on my quartz bathroom counter. It left behind spots which I can’t seem to remove. Is there a way to reverse this?
What about cleaning porcelain tile. I’ve attempted vinegar yet that leaves streaks as well.
Looking at the ingredients of my dish soap, I noticed it has citric acid in it even though it’s not citrus scented. Should I be concerned about sprays and splashes of soapy water damaging my granite counter if I don’t wipe it all up immediately after every dish washing session?
And given that there’s citric acid in my dish soap, can I use the granite cleaner recipe you provided safely? Is the amount of citric acid in my dish soap small enough that it’s probably okay? If not, could I swap castile soap for dish soap?
Thanks!
[…] Source – cleanmyspace.com […]
I have water streaks and spots on my stainless steel dishwasher that I can not remove with simple soap and water. What can I use to get rid of these stains? Thanks.
Try equal parts vinegar and water and wipe with a flat weave microfiber cloth. If that doesn’t work try using a bit of mineral oil on a paper towel going with the grain.
Any ideas on how to remove soap scum and hard water deposits from bronze rubbed oil bathroom fixtures???? Anybody????
You can try a bronze cleaner or contact the manufacturer for their recommended cleaning methods.
My bathroom sink is stainless steel, but different than the kitchen appliances. Any suggestions? At this time I am using (too infrequently, I know, I know…) Norwex cleaning paste. It is mildly abrasive and does not damage the finish. However, I would like a DIY solution, as the latter is expensive.
I use “BAR KEEPERS”. A white powder cleaner, use with water. Let it soak for tough stains. Rinse with water. It is a cleaner and stainless steel polish.
Thanks that was helpful.
I would like to know how to clean floor tiles. I have matt tiles and even though I steam clean them they leave streaks. How do you clean these effectively?
How about cleaning porcelain tile. I’ve trie vinegar but that leaves streaks too. I have dogs that will leave muddy footprints.
This is a great video! I use baking soda and peroxide on my glass ceramic cooktop. I want to try the one suggested here is as well!
I have a pebble like texture on the floor of my shower. Pretty sure it was laid down as tile, (we are not the original owners of the house), but I’m not sure what product to use (I’ve read stories about ruining something by using the wrong product).
I have Quartz count op and glass tile back splash. I’ve been using Fantstik spray. Any suggestions? Also, the grout between the counter and the backsplash looks gross.
So glad I found this site. Just watched the video on cleaning the oven racks. I have roll out racks in my oven. Can I clean those by soaking or will that damage the ballbearings or whatever allows them to roll?
Hope you can help with this.
Also the newer ovens have a blue finish on them. What is the best way to clean that interior?
Any recommendations for nickel light fixtures?
You never mention vinyl tile in kitchen – I use to use Future which was fine, but now that Pledge has taken it over I get streaks !!
Hi I have high gloss floor tiles how can I keep them sparkling? They have become dull and scummy despite regular cleaning.
What’s the best way to clean a granite composite sink?
The best ideas in one page, very helpful.
Thank you!
Hi – I have a polished galaxy granite floor. i asked the technician who had just sealed and polished it what i should use to clean it. He said soapy water. Disaster – I have soapy scum marks over the entire surface. How can i rectify this please?
Thanks
can i use synthetic vinegar instead of white one? i do not the diff b/w the both.
Thanks. Very helpful… I have high end Through-Bodied Italian Porcelain tiles in first floor and basement and like to know the best way to keep them clean without damaging them.
Can you use the granite formula as an all purpose cleaner disinfectant everywhere else such as
outside toilet, tile countertop and shower
Thank you for the great tips. What about cleaning leather?
I love your blog!! I recently discovered using oil on my stainless appliances and I love it! My question is, do you have a special microfiber cloth for using oil on? You posted that oils don’t come out of the micro fiber, yet you recommend applying the oil and buffing it off with microfiber. Thanks!
Red oil rags are awesome and absorb oils so you use less…found in the automotive departments of most stores.
[…] Read the rest of the article here from Cleanmyspace.com […]
I have read not to combine castile soap and vinegar. What are your thoughts on that?
You are amazing could you please help me how to clean carpets from cats hair ?
Awesome info. I am having trouble finding a good product for my laminate floors. Hope this works. Enjoy your site often.
[…] you a general list here. But, if you have any specialty finish in your bathroom, I encourage to check out the post on cleaning high-end finishes so that you know exactly how to clean these areas without ruining anything. Here’s what […]
What a amazing article, very helpful that I have read this…